Learn how to use your Synology NAS as a hive-node on hiveNet using Docker. This article provides step-by-step instructions to ensure you're up and running in no time.
What is Docker and why use it?
Docker is a platform that enables packaging of applications and their dependencies into containers. It allows your NAS to connect to hiveNet safely and efficiently. Here's what Docker brings to the table:
- Isolation: Keeps your hive-node safe from other software on your NAS.
- Portability: Move your hive-node to other systems without any fuss.
- Scalability: Easily adjust how much you want to contribute to hiveNet.
- Version Control: Ensure you're always using the safest and latest hive-node software.
Ready? Let's dive in!
What you'll need
Before we begin, make sure you have:
- A Synology NAS with DSM 7.1 or newer.
- A hiveNet account. If you don't have one yet, sign up here.
Setting up your Synology NAS
Step 1: Prepare local files
- Configuration Files: On your computer, create a folder named machine-id. Inside, you'll need a unique 32-character code. You can generate one using this website (remember to disable hyphens).
Here's an example code (but please create your own!): 76c4bb0a2d114d7d8d48d8f076e0e6df
Step 2: Transfer files to the NAS
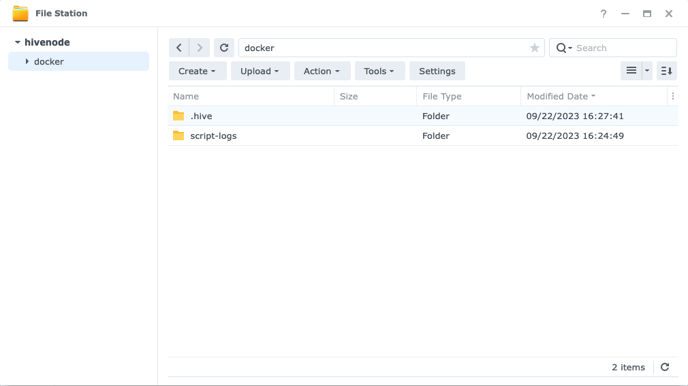
- Open File Station on your NAS and create a folder named docker.
- Inside docker, make two subfolders: .hive and script-logs.
- Upload the machine-id file you created earlier into the .hive folder.
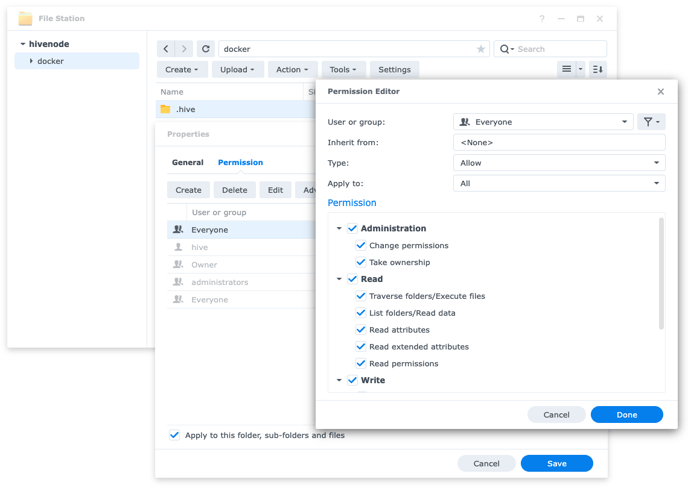
Step 3: Set permissions
- Click on Properties for the .hive folder.
- Go to the Permissions tab and click Create.
- For the “Everyone” user, set "Administration," "Read," and "Write" permissions.
- Ensure it's applied to the folder, sub-folders, and files, then save.
Step 4: Install Docker and launch the Hive container
- Navigate to Package Center and install Container Manager (or Docker if you are on an older version of DSM).
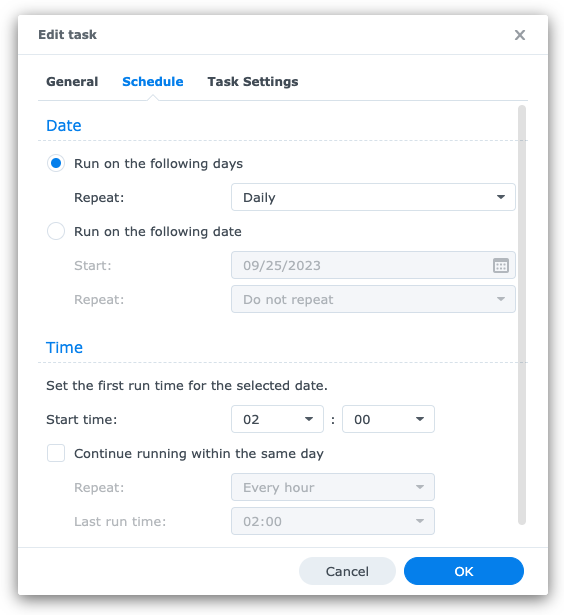
- Create a task named “hiveNet container” in Control Panel -> Task Scheduler.

- Set the task to check for hiveNet agent updates daily.
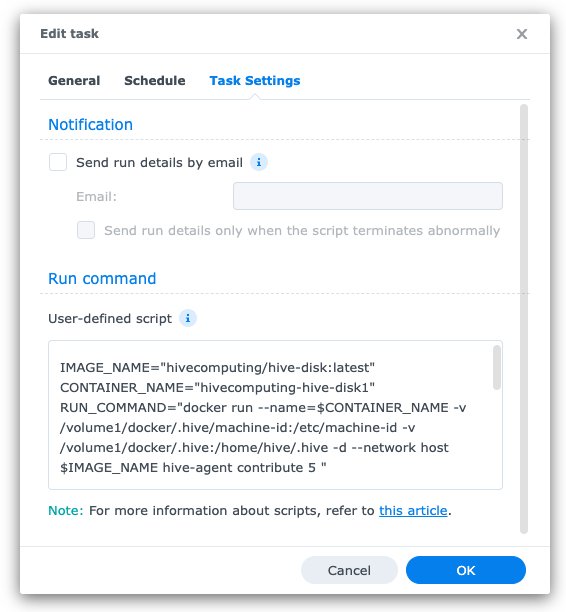
- Paste the provided Bash script into the "User-defined script" field.
The script manages the container, updates, and contribution! Change the script according to your needs, by adjusting the following elements:
-
the location of the Hive data: update /volume1/hiveNet with the relevant location on your NAS
-
the amount of space you want to contribute: update contribute 5 the number of GB
you want to contribute :
#!/bin/bash

IMAGE_NAME="hivecomputing/hive-disk:latest"
CONTAINER_NAME="hivecomputing-hive-disk1"
RUN_COMMAND="docker run --name=$CONTAINER_NAME -v /volume1/docker/.hive/machine-id:/etc/machine-id -v /volume1/docker/.hive:/home/hive/.hive -d --network host $IMAGE_NAME hive-agent contribute 5
# Function to get image id of a Docker image
function get_image_digest {
local image=$1
docker image inspect --format="" "$image" 2>/dev/null
}
# Function to get container id of a Docker container
function get_container_id {
local container=$1
docker inspect --format="" "$container" 2>/dev/null
}
# Function to get image digest of a Docker container
function get_container_image_digest {
local container=$1
docker inspect --format="" "$container" 2>/dev/null
}
# Function to get container state
function get_container_state {
local container=$1
docker inspect --format="" "$container" 2>/dev/null
}
# Function to get image ID from image digest
function get_image_id_from_digest {
local digest=$1
docker images --digests --no-trunc | grep "$digest" | awk '{print $3}' 2>/dev/null
}
echo "Checking for new image..."
docker pull "$IMAGE_NAME" > /dev/null
LATEST_IMAGE_DIGEST=$(get_image_digest "$IMAGE_NAME")
# Get container id
CONTAINER_ID=$(get_container_id "$CONTAINER_NAME")
# If the container does not exist or if new image is available
# If the container does not exist
if [ -z "$CONTAINER_ID" ]; then
echo "Container $CONTAINER_NAME does not exist creating container... (searched for Container ID $CONTAINER_NAME)"
$RUN_COMMAND
else
echo "Container $CONTAINER_NAME exists : ID $CONTAINER_ID"
# Get container state
CONTAINER_STATE=$(get_container_state "$CONTAINER_NAME")
# If the container is stopped
if [ "$CONTAINER_STATE" == "false" ]; then
echo "Container $CONTAINER_NAME is stopped. Starting container..."
docker start "$CONTAINER_NAME"
fi
CONTAINER_IMAGE_DIGEST=$(get_container_image_digest "$CONTAINER_ID")
if [ "$CONTAINER_IMAGE_DIGEST" != "$LATEST_IMAGE_DIGEST" ]; then
echo "Container image is not up to date"
docker stop "$CONTAINER_NAME"
echo "Container $CONTAINER_NAME is stopped"
docker rm "$CONTAINER_NAME"
echo "Container $CONTAINER_NAME removed"
OLD_IMAGE_ID=$(get_image_id_from_digest "$CONTAINER_IMAGE_DIGEST")
docker rmi $OLD_IMAGE_ID
echo "Old image : $OLD_IMAGE_ID - removed"
$RUN_COMMAND
CONTAINER_ID=$(get_container_id "$CONTAINER_NAME")
echo "Container $CONTAINER_ID started with latest image $LATEST_IMAGE_DIGEST"
else
echo "Container $CONTAINER_ID is up and image is up to date, nothing to do"
fi
fi
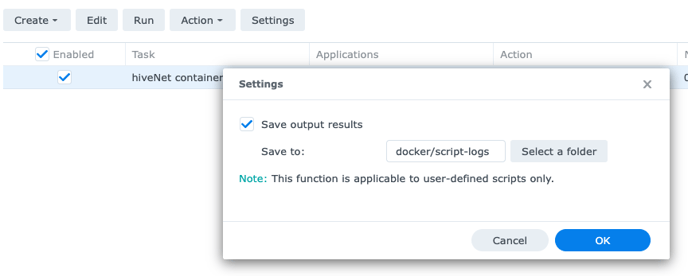
5. Select settings in Task Scheduler and configure the Save output result to be saved in “docker/script-logs”.
Step 5: First run and authentication
- Locate and run the task in the Task Scheduler.
- Confirm the hiveNet Docker container is active.
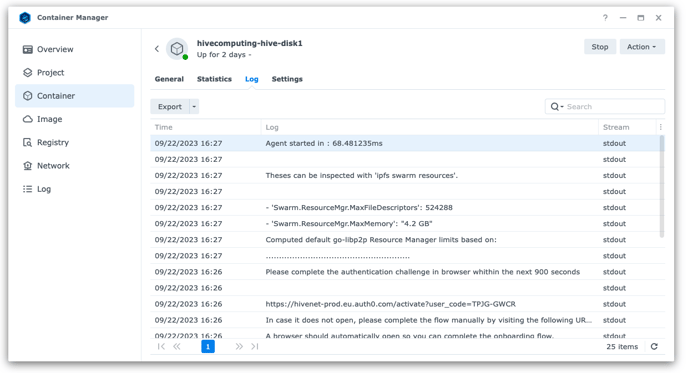
- For the first run, authenticate your node with your Hive account using one of two methods:
- Via the Container Manager logs.
- Or by checking the .hive/logs folder on your NAS.
Copy the URL you find in either and open it in a web browser. Follow the on-screen prompts to link your hive-node with your hiveNet account. You're all set once you see a “Agent started in…” line in the logs.
Hey, new Hiver!
Congratulations! You're now a proud part of the hiveNet community with your Synology NAS buzzing away!